CW Skimmer
Digging for signals
Introduction
As of October 8th, 2016 this software supports CW Skimmer from Afreet Software inc. CW Skimmer simultaneously decodes all CW signals in the receiver pass band - either 48, 96 or 192kHz. As well as CW Skimmer. Many thanks to Alex for the complimentary licence.
Follow the instructions on this page to::
- Install a virtual serial cable - frequency control between SDR Console and CW Skimmer using the TS-2000 CAT protocol,
- Install a virtual audio cable - IQ data sent from SDR Console to CW Skimmer,
- Configure SDR Console,
- Configure CW Skimmer,
- Tune SDR Console to CW Signals!
Known Problems
Display
The spectrum and Waterfall in SDR Console use DirectX graphics, CW Skimmer uses GDI / GDI+. It is possible that the two do not behave together well causing the SDR Console waterfall to stagger.
Virtual Serial Cable
Recommended:
✓ VSP Manager from K5FR, free for licenced amateurs only
Other:
- Eltima Software - Virtual Serial Port Driver, 14 day free trial
- VSPE from Eterlogic.com, free for 32-bit systems,
- com0com Null-Modem Emulator.
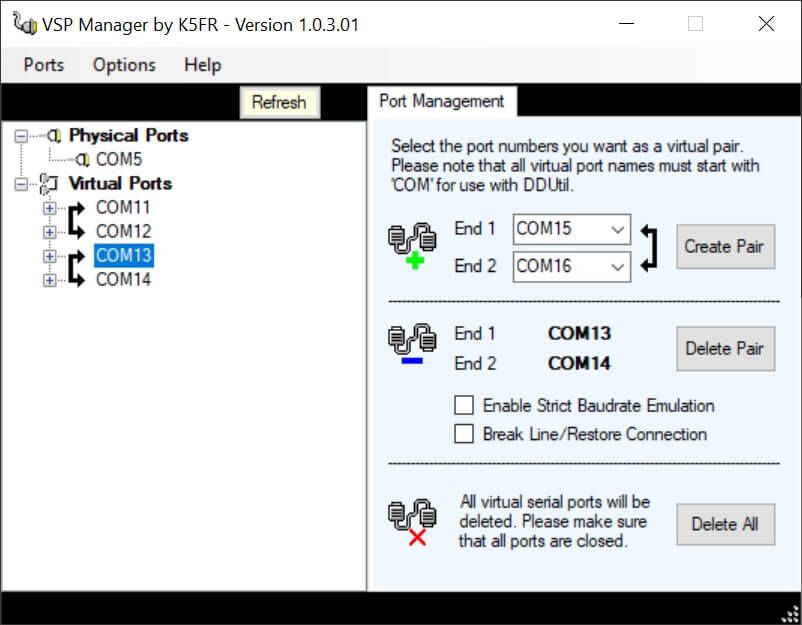
VSP Manager
Download, install. Run the manager as Administrator and create a virtual pair. Check that the pair is created after a system restart.
Virtual Audio Cable
CW Skimmer reads the IQ data from the console over the virtual audio cable at a bandwidth of 48, 96 or 192 kHz (48kHz is recommended).
Recommended:
- VB Audio from VB-Audio Software (donationware)
- Virtual Audio Cable from Eugene Muzychenko.
The interface uses a two-channel connection (I and Q), so the VAC settings must allow at least two channels.
⚠️ Do not use the VAC for anything else such as audio, used only as described above.
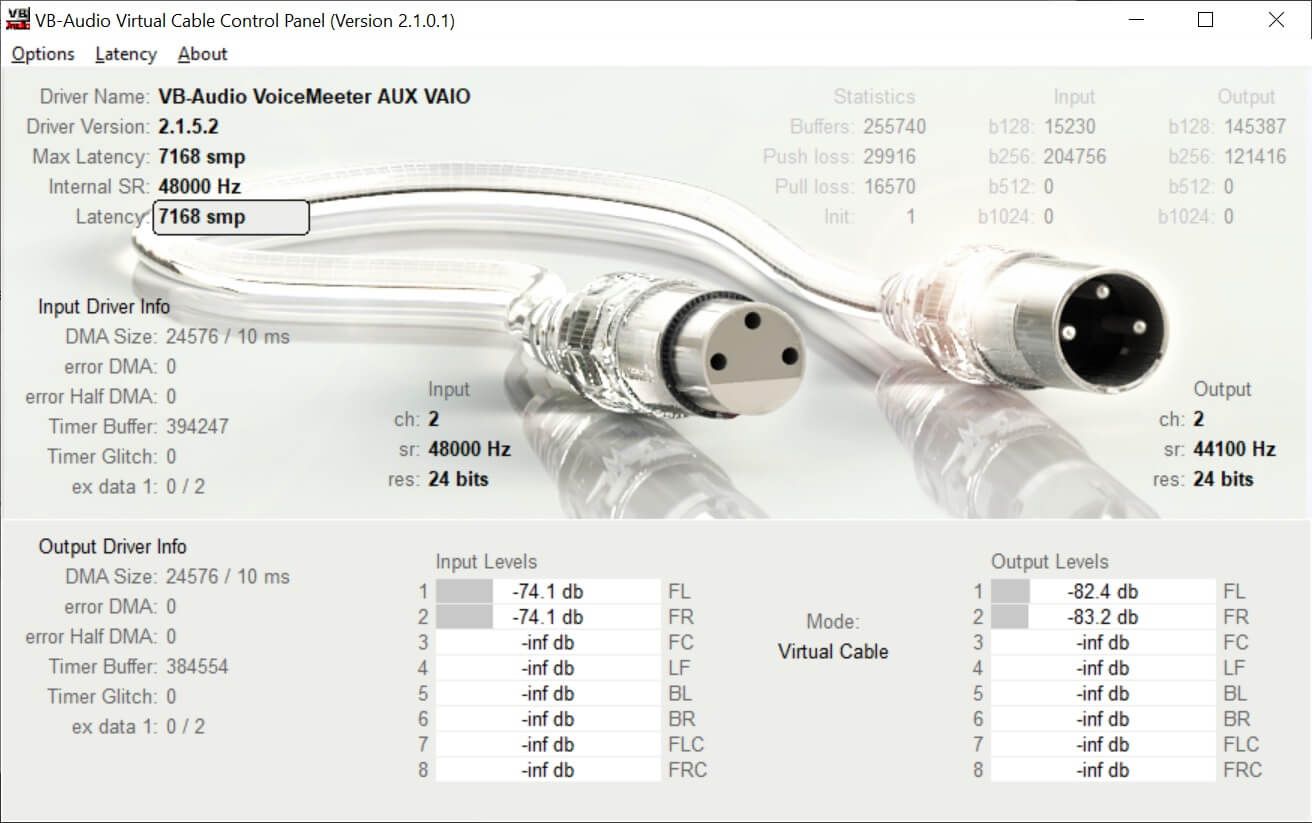
VB Audio
- Download the Voicemeeter program from https://www.vb-audio.com/Voicemeeter/index.htm.
- Install, a cable is created as part of the installation:
- SDR Console writes to Voicemeter Aux Input
- CW Skimmer reads from Voicemeter Aux Output
Note: using the Voicemeter Input / Voicemeter Output combination has not been reliable. The needs further testing.
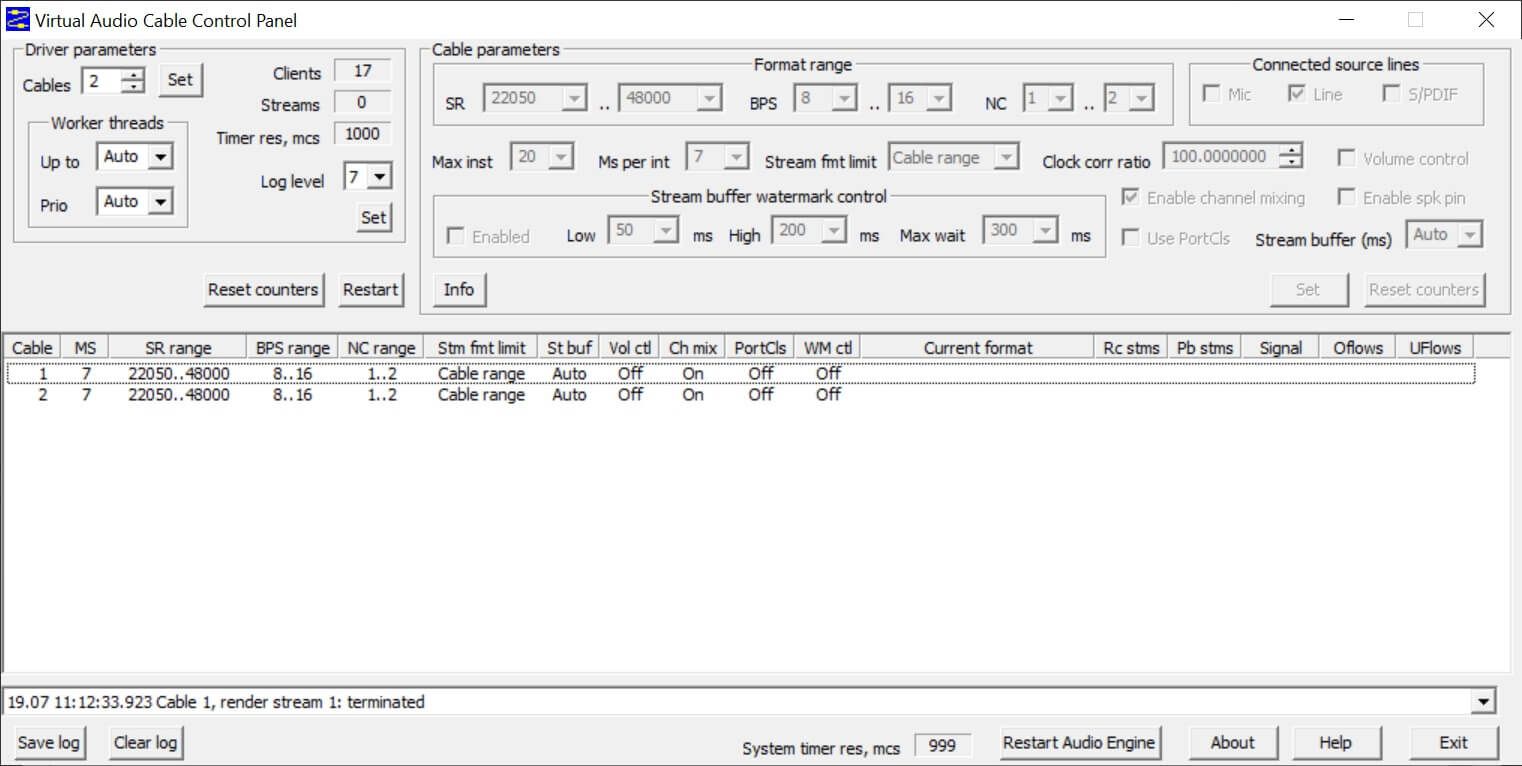
Virtual Audio Cable
In the example below two audio cables are created, only one is needed for CW Skimmer, The second is used for other software.
SDR Console and CW Skimmer use the same cable, shown as Line 1 (Virtual Audio Cable).
Console Configuration
VB Audio
In the console program select More Options... in the View pane of the ribbon bar. Press the Select button to enable the options to be displayed. Make sure CW Skimmer is checked, then press OK. You will be prompted to restart the program. When restarted the CW Skimmer option is available.
Now press the CW Skimmer button to display the options.
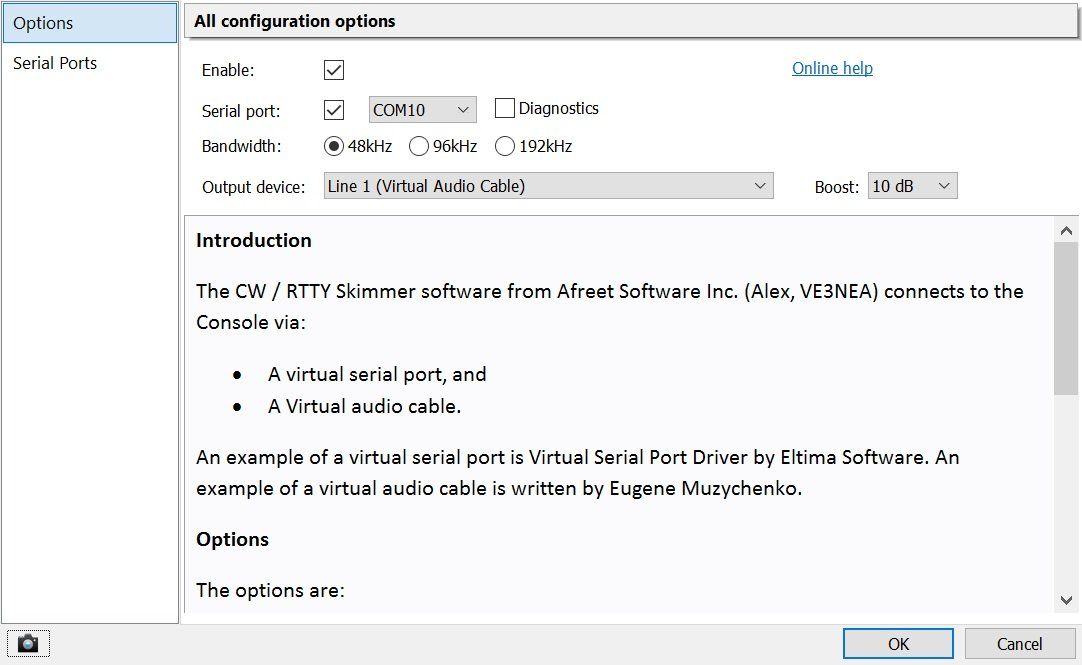
The options are:
- Enable - when selected [X] the Serial port and Output device are opened.
- Serial port - one end of the virtual serial cable (more information below).
- Diagnostics - when enabled all serial port traffic is sent to the system debugger, see Diagnostics below.
- Bandwidth - the data (IQ) bandwdith sent over the virtual audio cable. The recommended bandwidth is 48kHz, make sure the virtual audio cable is configured to support the selected value.
- Output device - the virtual audio cable.
CW Skimmer Configuration
CW Skimmer is configured to use:
- Radio type SoftRock-IF
- Sample Rate 48kHz
- Audio Signal I/O Device: the virtual audio cable
- CAT TS-2000 with the virtual serial cable
In more detail
Start CW Skimmer, from the View menu select Settings.
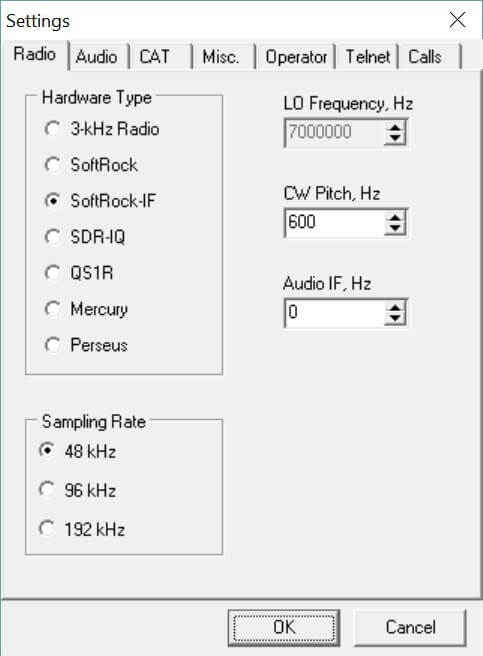
Radio:
Select Hardware Type SoftRock-IF, sample rate 48kHz.
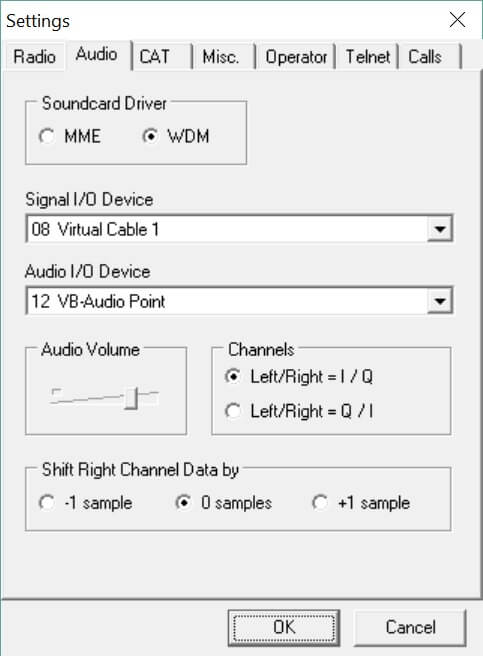
Audio:
Signal I/O Device select the same virtual audio cable selected in the console,
(Optional) Audio I/O Device select the device for audio playback.
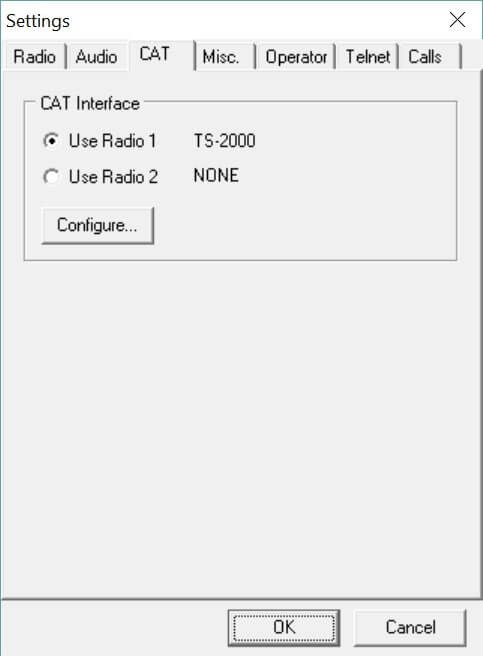
CAT:
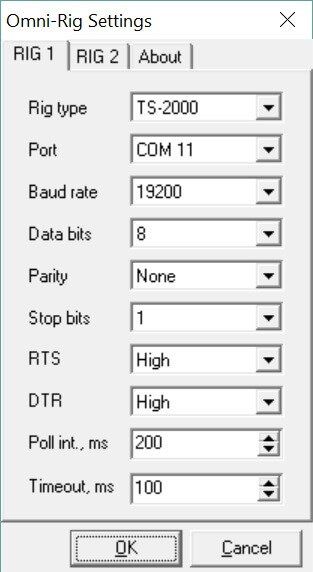
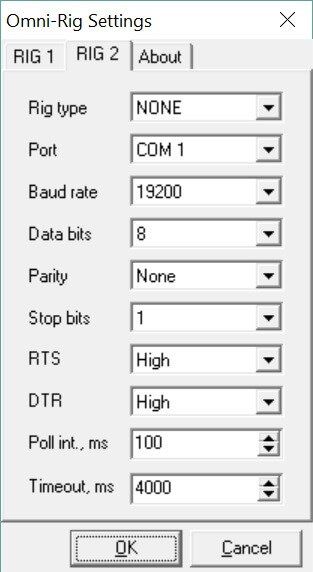
Press Configure to display the OmniRig settings, Select Radio 1 TS-2000, Radio 2 None.
OmniRig
These settings have been found to work well. Note in Rig1 the Port is part of the virtual serial cable, explained in the Console configuration. You do not want Rig2 defined so select NONE from the RigType dropdown. Set the polling interval in ms to 200ms, the default is 1000ms.
OmniRig
Now click the first button in the CW Skimmer toolbar - Start/Stop Radio. Two things should happen:
- A connection is made with the console via the serial cable, the console's lower frequency (left-hand side of the waterfall display) is shown in the CW Skimmer frequency windows, and
- The waterfall starts scrolling with CW signals.
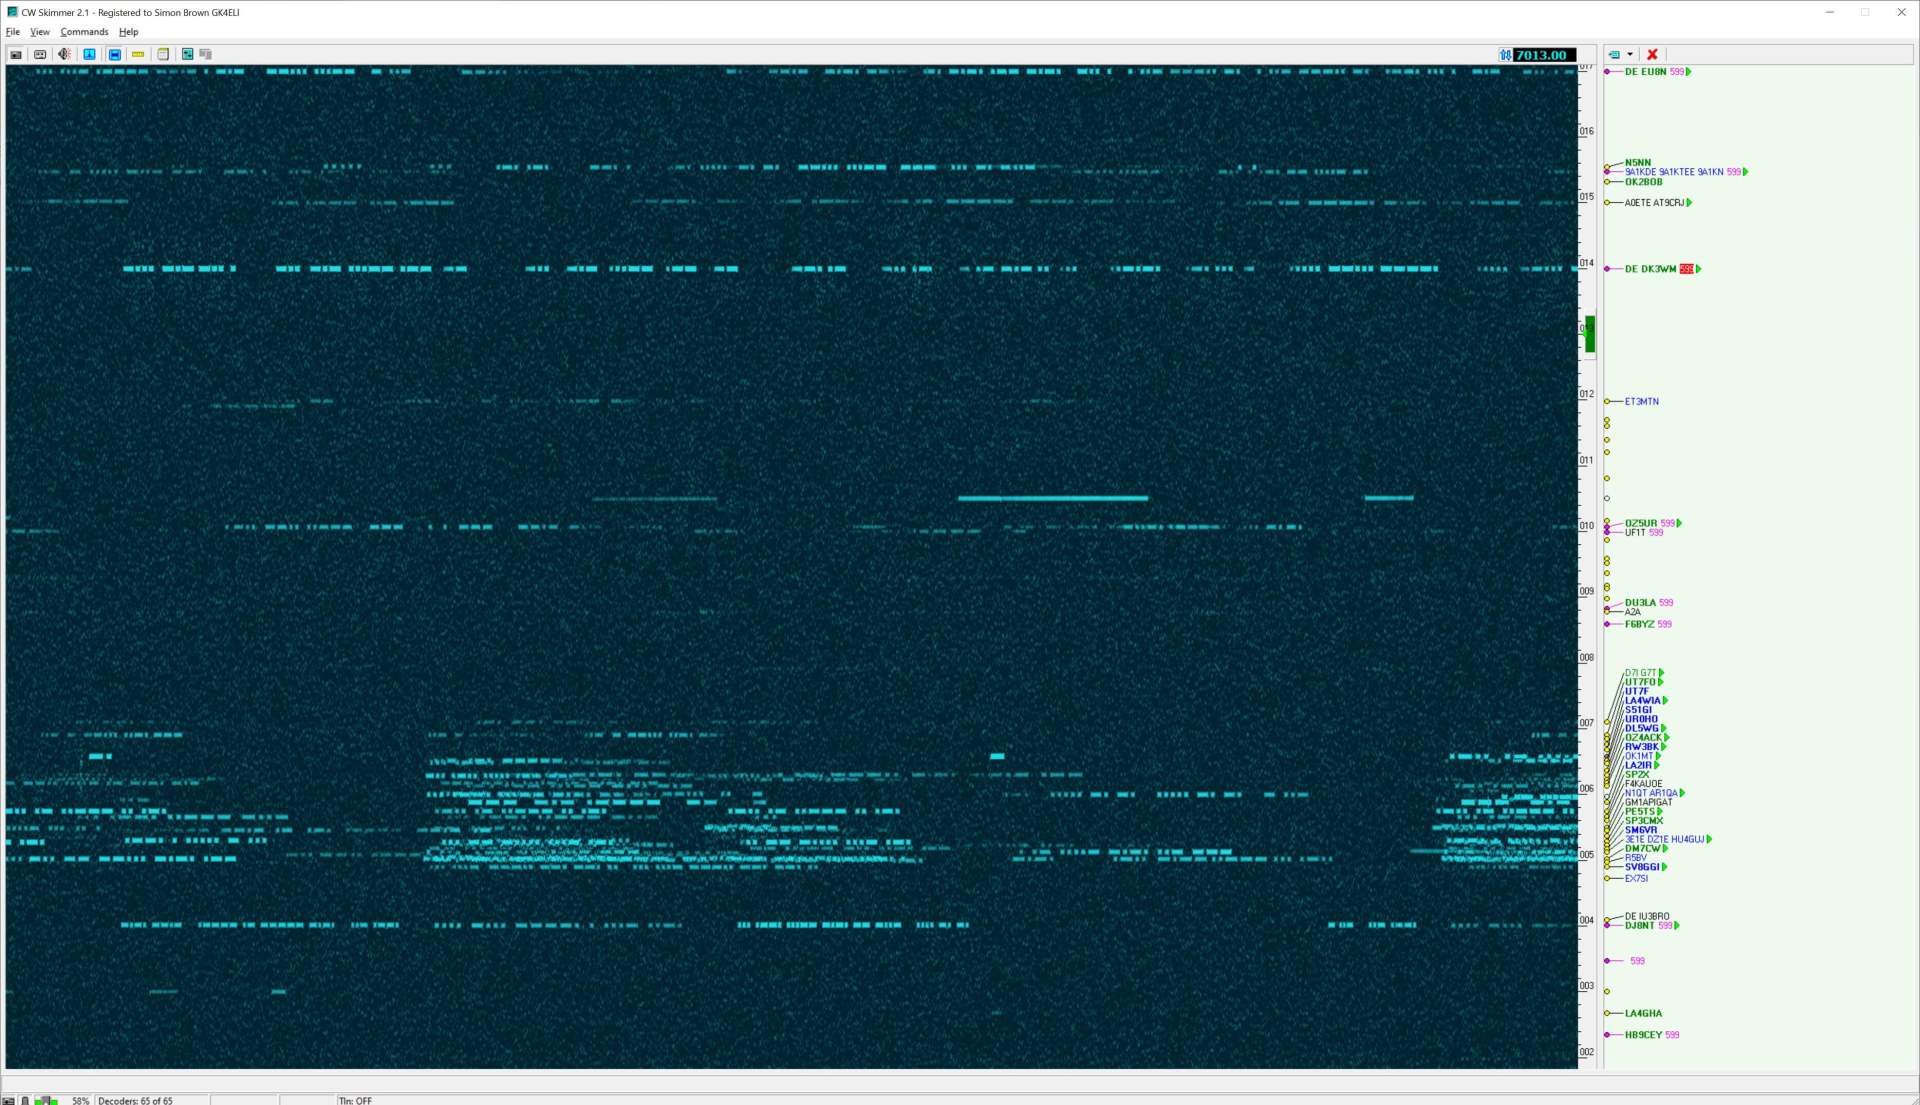
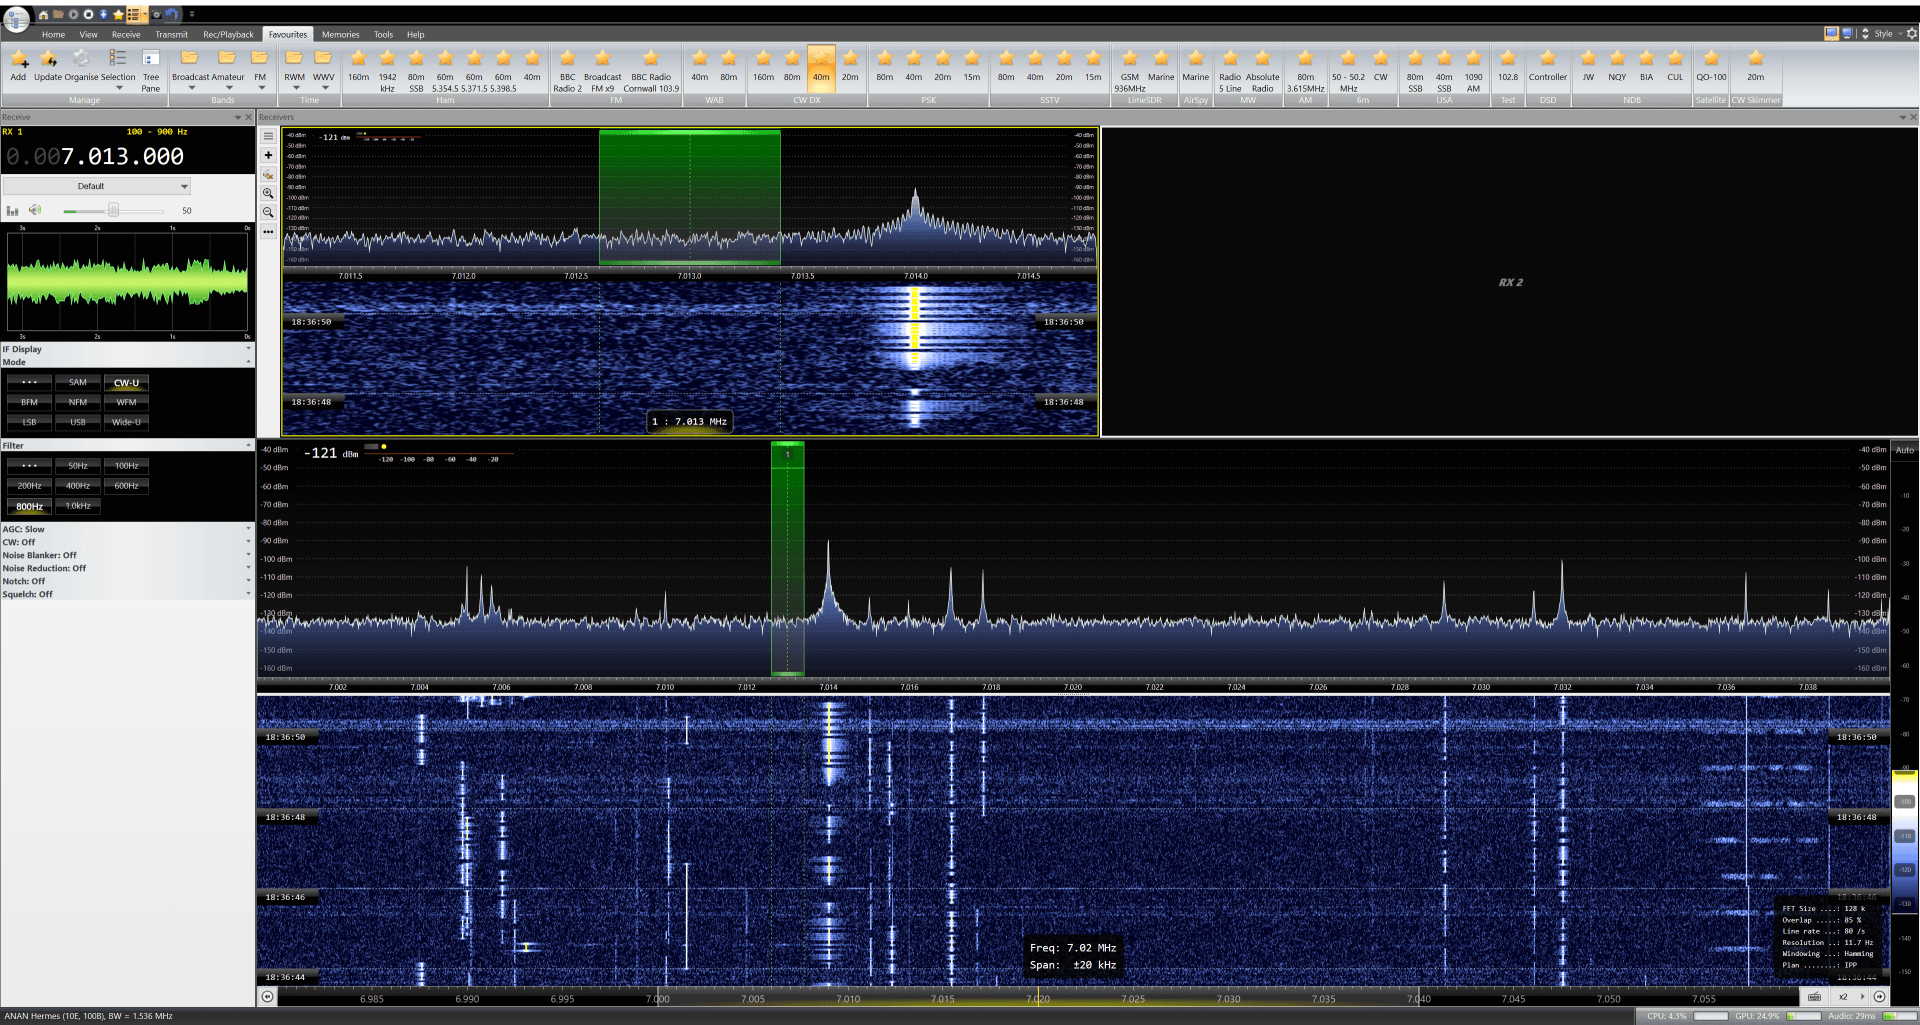
Example
In this example CW on 40m is displayed in CW Skimmer. Click on the images below for full-size screenshots.
- Start SDR Console
- Select the COM port and virtual audio cable
- Make sure CW Skimmer is enabled
- Tune to 40m
Now start CW Skimmer
- Select the COM port and virtual audio cable
- Click the first button in the toolbar (Start / Stop Radio)
Checks
- The frequency shown at the top of CW Skimmer should be the same as frequency shown in RX 1 in SDR Console. If the frequency shown is 0.00 then the virtual serial cable is not configured corrected.
- The waterfall should start scrolling, if not there is a problem with the virtual audio cable configuration
Tuning
Tuning of the active receiver in SDR Console works one way only - click on a signal in CW Skimmer. You may have to perform this a few times before the signals seen in SDR Console are correctly displayed in CW Skimmer.