DSP Panel
It's a numbers thing!
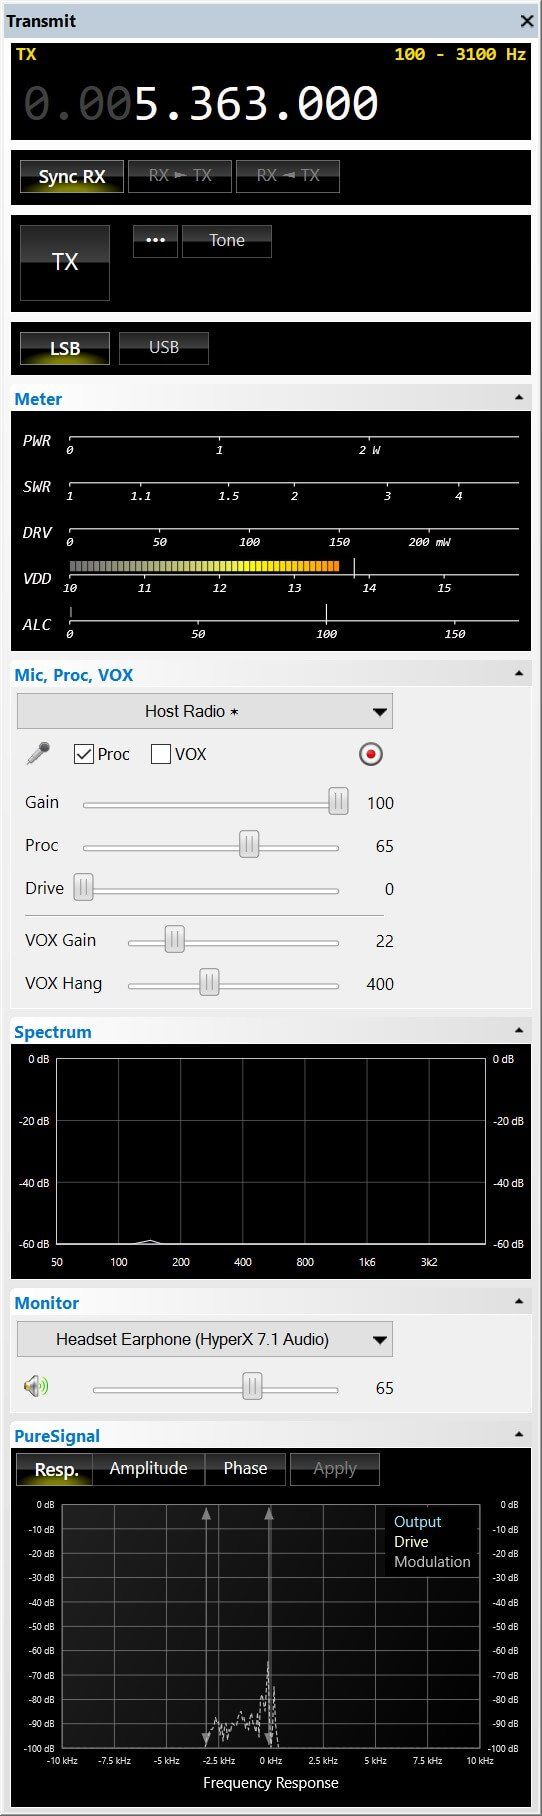
Here is a screenshot of the entire DSP panel, this is described later on these pages.
Frequency Entry:
The standard frequency entry window - scroll a mouse wheel over the digits or click in the top or lower half.
Frequency Synchronisation:
If Sync RX is selected the transmit frequency will be the same as the active receiver frequency. RX ► TX copies the active receiver frequency to the transmitter, RX ◄ TX copies the transmitter frequency to the active receiver.
Transmit:
Select TX to toggle transmit on/off, ••• to display the common configuration options and Tone to replace the signal from the microphone with the output from the tone generator (common configuration).
Mode:
select the transmit mode, as new modes are developed they are added here.
Metering:
Showing of in style, here we have PWR (forward power, SWR, DRV (interval drive level), VDD (voltage as measured inside the unit) and ALC. The target ALC value is between 100 and 150.
Input:
Described in on this page.
Spectrum:
The spectrum from the microphone (or tone generator if selected).
Monitor:
Listen to the transmitted audio.
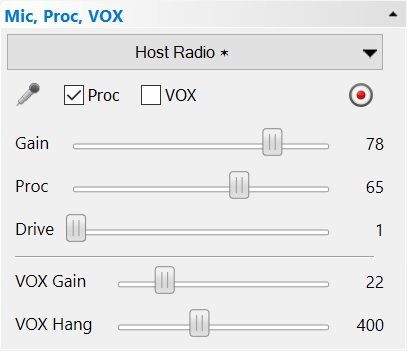
Input
The controls in the input window are used to set the audio level, amount of processing and transmitter drive.
The processor (Proc) increases the audio level, then applies a tanh (hyperbolic tangent) function to limit the output without any clipping. This is a very simple but at the same time effective method of increasing the audio power.
Your aim is to:
- set the gain level (and proc if selected) so that the ALC level is around 100 to 150,
- then adjust the drive level for the desired output power level..
VOX is Voice Operated eXchange - when you you talk and the audio level meets or exceeds the VOX gain the radio is switched into transmit, and stays in transmit until the level drops below the VOX gain for at least the VOX Hang duration.